I was excited when Smile Brilliant reached out for a partnership. I’ve always been a fan of teeth whitening, but have never gone a professional route. In the past, I’ve tried whitening strips, which make a small difference, but are not as impactful a customized system.
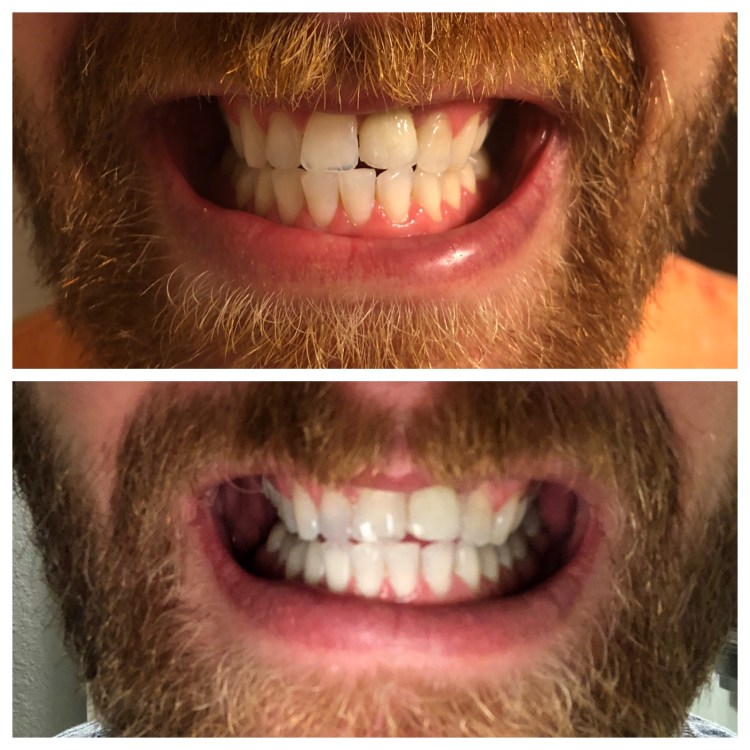
For this trial, Sam volunteered to be the whitening guinea pig since he is a HUGE fan of teeth whitening.
The Process
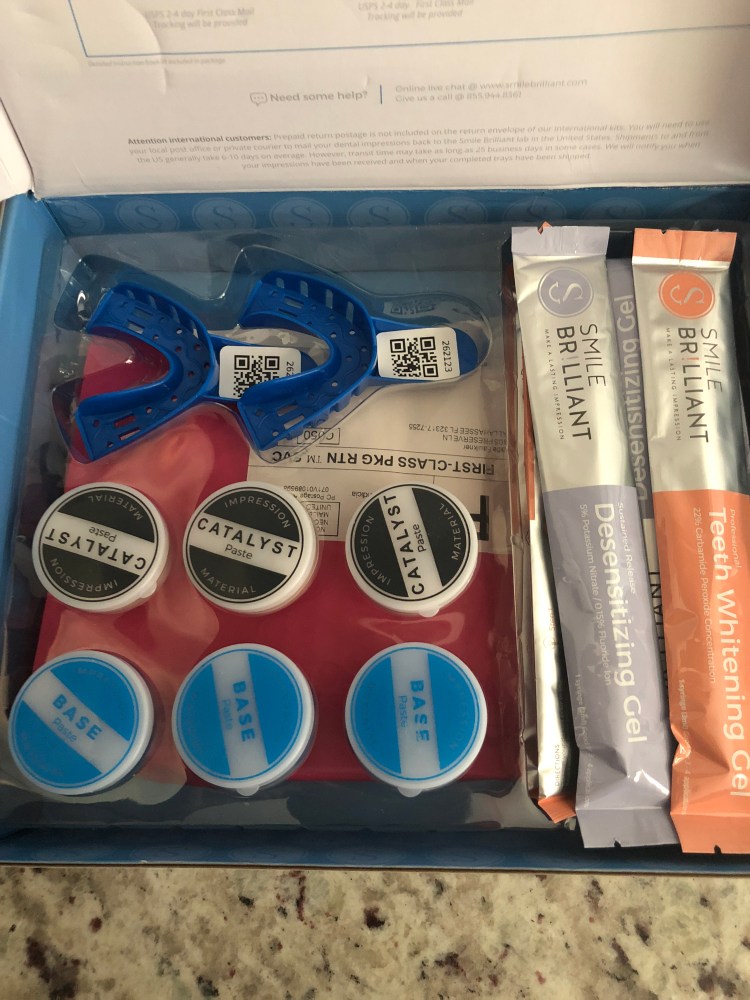
Once you sign-up for Smile Brilliant, you receive a kit via mail that includes everything you need for your custom, at-home whitening experience.
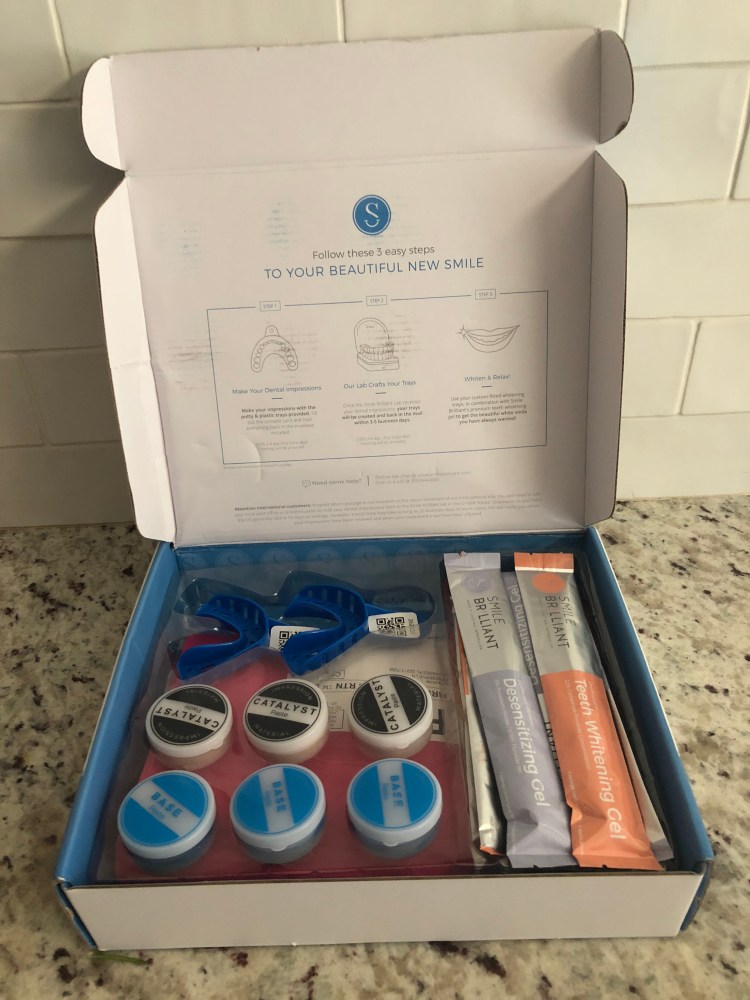
The most important part of this first step is getting your teeth impressions (both top and bottom) done correctly, so when they make the custom trays, they fit like gloves! Smile Brilliant provides the paste and plaster, which you mix together to create the impressions. While the instructions are very visual and show you a good and bad impression example, you can always double confirm via email before mailing them in. It’s also important to mail in a consent card with the impressions!


A couple of weeks later, the teeth trays came in and Sam noted how impressed he was with the fit. This was one of the biggest pluses to doing this type of teeth whitening versus strips. The trays are flush with your teeth and allow you to whiten for a lot longer without drooling and mouth dryness.
Whitening
The kit we received came with enough gel for 12 whitening treatments. You can leave the treatment on for up to three hours, but you have to work up to that. The kit also includes a desensitizing gel that you do after the whitening for 15-20 minutes.
Sam started by doing the treatment for 45 minutes and eventually worked his way up to three hours. He did experience some sensitivity and his jaw bothered him at first, but he got used to both after doing the treatments a few times. The sensitivity issue was resolved as soon as he began using the exact recommended amount. So we would recommend to follow instructions to a tee to ensure the best experience.
This treatment soaks into your teeth, so it works really well. One of the things we learned was that anything under 20 minutes isn’t really doing anything.
Also, if you have gum sensitivity, one of the tricks to protect gums from irritation or sensitivity is to use Vaseline or coconut oil on the gums during whitening. Just a thin layer will do the trick.
Overall Recommendation
This at-home customized treatment is definitely worth the investment because you get to keep the custom trays and can always order extra whitening gel, which will only cost a fraction of the original investment.
I’m excited to be giving away one kit to a lucky reader.
COUPON & GIVEAWAY DETAILS:
15% off coupon code: 30somethingandthriving15
Giveaway link: www.smilebrilliant.com/g/30somethingandthriving
-
The giveaway is for a $149 Smile Brilliant credit. Open for at least 1-2 weeks (after blog post date) and open to USA, UK, Australia and Canadian residents.
Happy Whitening!
Ivette
<!– SMILE BRILLIANT ARTICLE WIDGET START –> <a id=”smilebrilliant_widget_article” ishidden=”1″ title=”Professional Teeth Whitening”>Professional Teeth Whitening</a> //a%20href= <!– SMILE BRILLIANT ARTICLE WIDGET END –>
